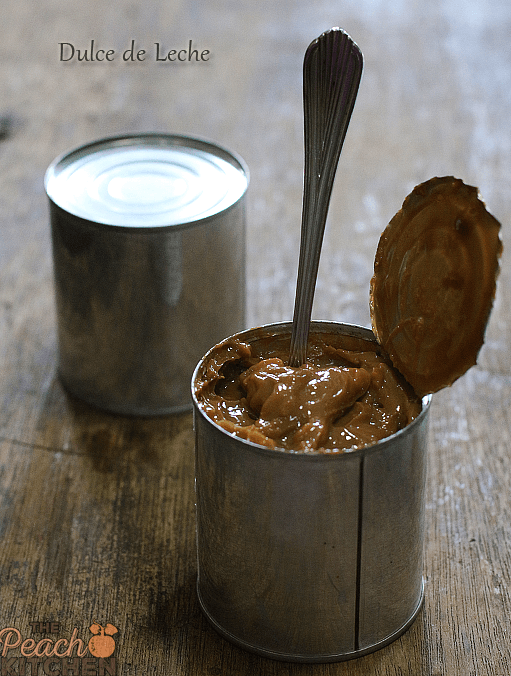
Homemade Dulce de Leche is condensed milk turned into a thick, wonderful caramel.You can use it to top cakes, ice creams, breads or anything that tickles your fancy.

Workouts officially started last November 1st even if it meant I’m gonna be eating a lot the following day which happens to be my father’s birthday. It lasted a toturous 15 minutes before I gave up. I was catching my breath and it felt like just one more move and I’m gonna be frozen solid on that last move. Gaaah! I realized was so out of shape after not working out for almost a year my joints need oiling. I couldn’t even last a good 20 minutes of working out. No wonder Twinkle tires me out easily….
I would really have to up my game because Twinkle has also discovered how to make me carry her and not put her down until she’s asleep!
I actually didn’t know when and how I would start dieting and working out but I know it has to begin as soon as possible. So I gathered all the motivation I could gather and just began the first day of November.
Guess what? I can last for 30 minutes now. LOL! Still catching my breath like crazy but I’ve done it. That’s a good thing, right?

This Dulce de Leche was also made last November 1st … a day in advance before it goes into a graham crust and turned into Banoffee Pie for Tatay’s birthday.
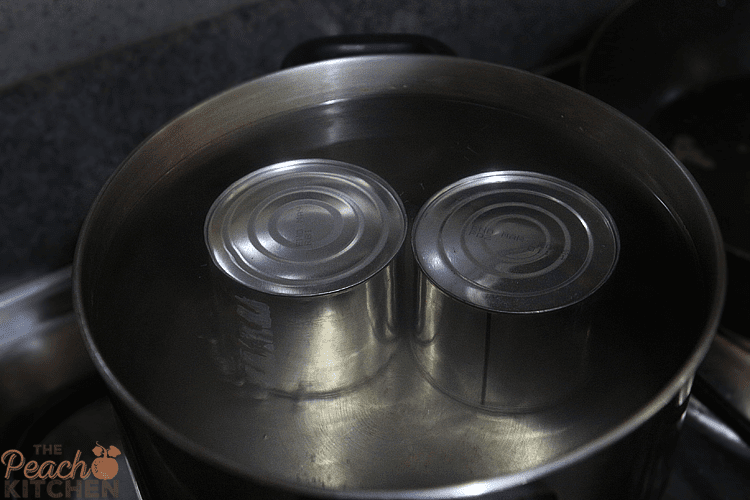
It’s so easy to do, just put your cans of condensed milk in a pot of water. Bring it to a boil and forget about it for 3 hours.
Dulce de leche tastes like heaven on earth and you can use it to top anything that your heart desires. You can use it to top ice cream, cakes, breads, puto, saging con hielo, halo-halo —- ANYTHING.
Stay tuned for my Easy Banoffee Pie. Coming up next.
Homemade Dulce de Leche
- Author: Peachy Adarne
Ingredients
- 2 cans condensed milk, labels removed
- 1 pot of water
Instructions
- Place 2 cans of condensed milk in a pot and cover it with water by 1 to 2 inches.
- Bring it to a boil, then reduce the heat to low for a nice slow simmer.
- Simmer the cans for 2 hours for a lighter golden dulce de leche and 3 hours for a deeper color and flavor.
- Check from time to time and replenish water as needed. The cans should always be submerged in the water.
- After the simmering time, turn off the heat and allow the cans to come to room temperature.
- I usually let it cool overnight.
- Open the can and transfer to a clean container. It will keep in the fridge for a month.












21 Responses
I’ve always wanted to give this a try! Thanks for the inspiration Peachy!
you’re welcome MJ!
I’ve been wanting to try this for the longest time. But I’ve always hesitated. It’s good to see it successfully done, and I am totally going to try this now, lol. Thanks for the very easy to follow instructions!
you’re welcome.
I’m drooling daw. My husband is telling me should make dulce de leche but I am afraid to use pressure cooker. Pwede pala kahit hindi. Thanks!
yes, long pakulo lang but it’s worth the wait.
I’ve done this too and boy! The long wait was worth it!
Cheers!
Wow! Super easy lang pala though it takes time to cook. I will try this at home. 🙂
Enjoy!
wow, ito kayang kaya kong gawin to! haha. I’ll try this out. 😀
★★★★
I’m sure you’ll love it..
Thank you for this super easy recipe. Yes! the homemade dulce de leche looks delicious. Can’t wait to try.:)
you’re welcome Melgie
parang ang bilis and dali lang, hays when kaya me makakapag kitchen
Madali lang talaga Mommy Anna!
I’m making this homemade dulce de leche ever since my childhood years. Your procedure is the same as mine. Usually, I made it for bread as palaman or with banana Q.
Ang aga ko namang natakam… It looks yunmy. Triny mo na ba syang ibenta? Mukang masarap syang alternative sa mga usual na palaman. Go na sis 🙂
Thanks Cai!!
I remember watching an episode on how to make a dulce de leche and just like this it will need 2 hours of cooking. I really love dulce de leche but these days, I can’t spend 2-3 hours for just cooking. lol But if needed, of course I am willing to spend on that 2 hours though.
That’s good to know Zwitsy!